【Xlinx】【ZynqMP】使用xsdb工具,通过仿真器启动uboot教程
- 作者: 谁的浮生乱了谁的流年
- 来源: 51数据库
- 2021-07-28
1,背景
1,新板子,不用SD卡接口,只有仿真器连接,需要启动u-boot,对emmc,或者qspi flash进行分区,装载启动固件等操作。
2,vivado和petalinux的版本都是2020.1。
3,查过Xilinx官方的一些文档,比如https://www.xilinx.com/support/answers/67157.html
使用xsdb工具,按照其中的操作,会在装载fsbl.elf后,出现报错,说:
“PMU-FW is not running, certain applications may not be supported”

4,下面的操作教程,可以解决这一问题。
2,教程
1,xsdb是安装vivado或者vitis时,生成的可执行文件,可以去vivado的安装目录中寻找,比如:

2,进入存有固件的目录,保证目录中有下面几个文件:
bl31.elf,pmufw.elf,u-boot.elf,zynqmp_fsbl.elf
3,前提,板子启动模式调整到JTAG模式,并且执行复位操作。
4,运行xsdb

5,使得PMU设备可见,顺序敲入下列指令:
connect
targets
targets -set -filter {name =~ "PSU"}
mwr 0xffca0038 0x1ff
targets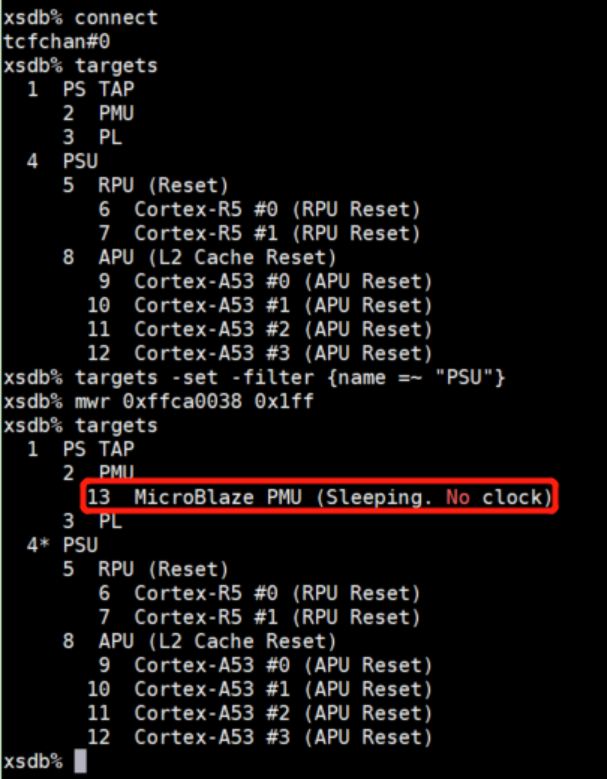
6,装载并运行PMU固件,顺序敲入下列指令:
targets -set -filter {name =~ "MicroBlaze PMU"}
targets
dow pmufw.elf
con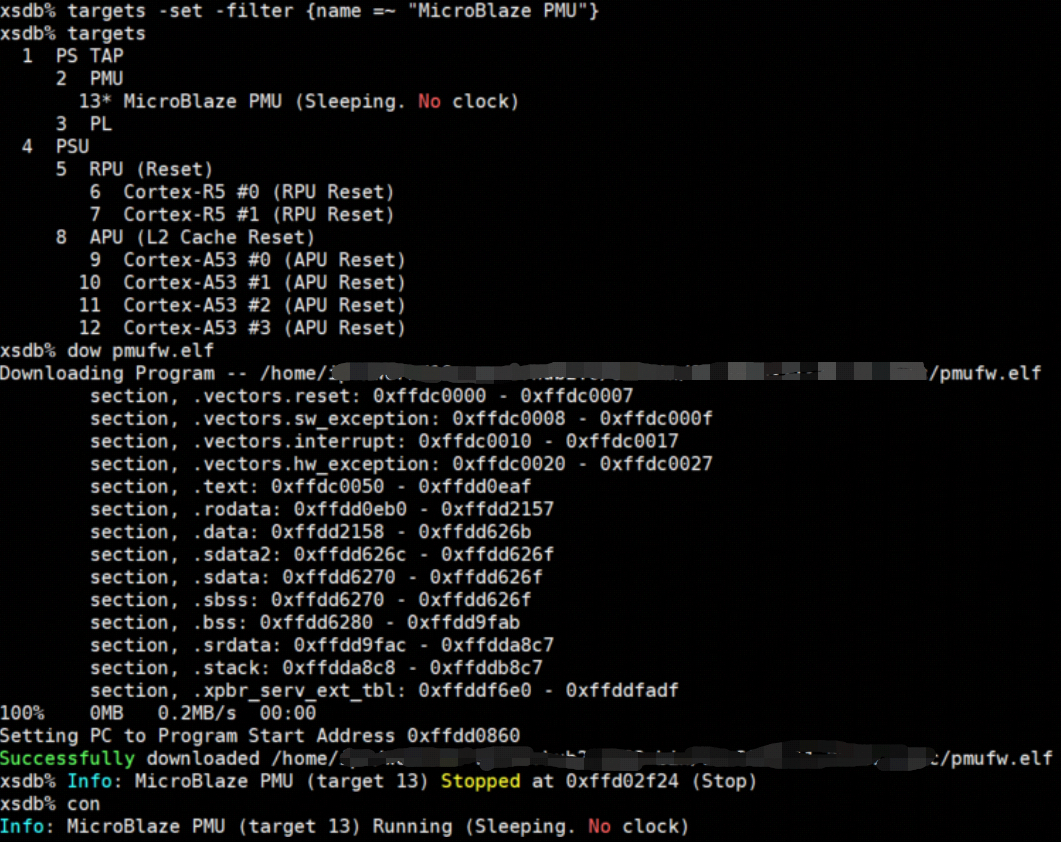
7,装载并运行FSBL固件,顺序敲入下列指令:
targets -set -filter {name =~ "Cortex-A53 #0"}
rst -processor
dow zynqmp_fsbl.elf
con
stop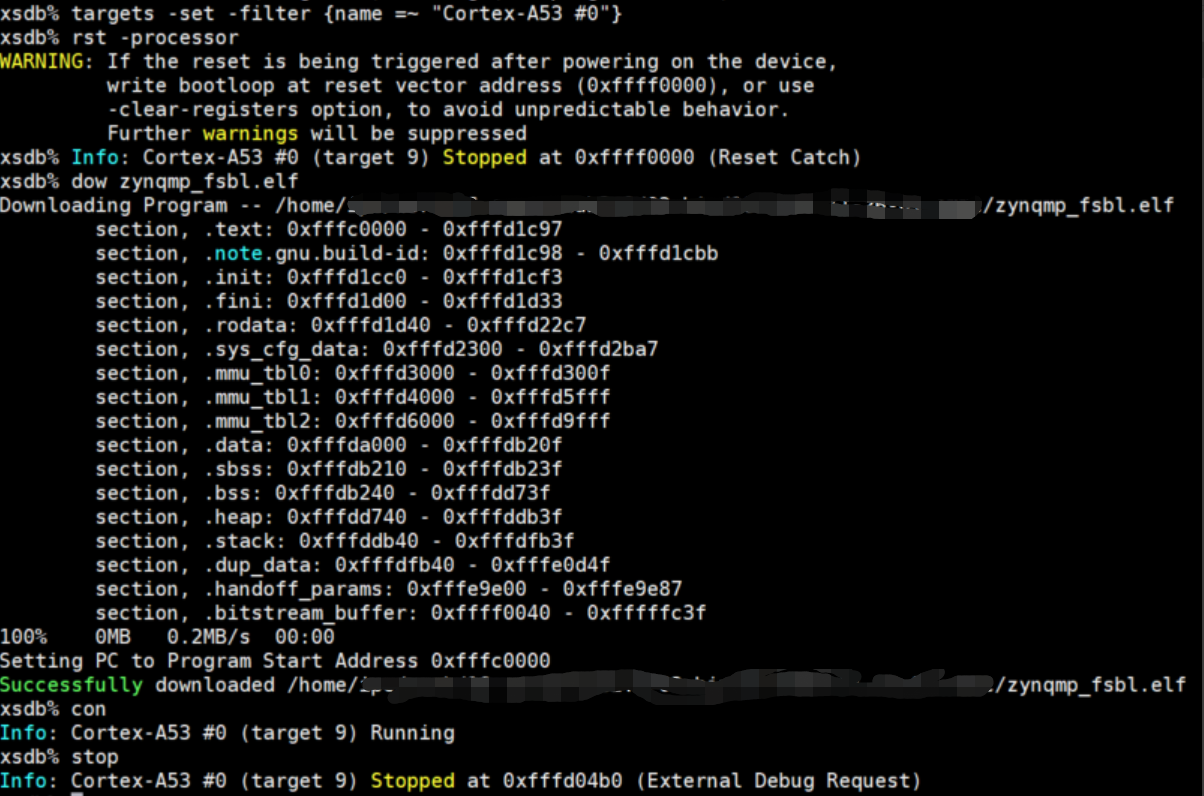
这时如果连有A53的调试串口,会有如下log输出:

8,装载并运行ATF,顺序输入下列指令:
dow bl31.elf
con
stop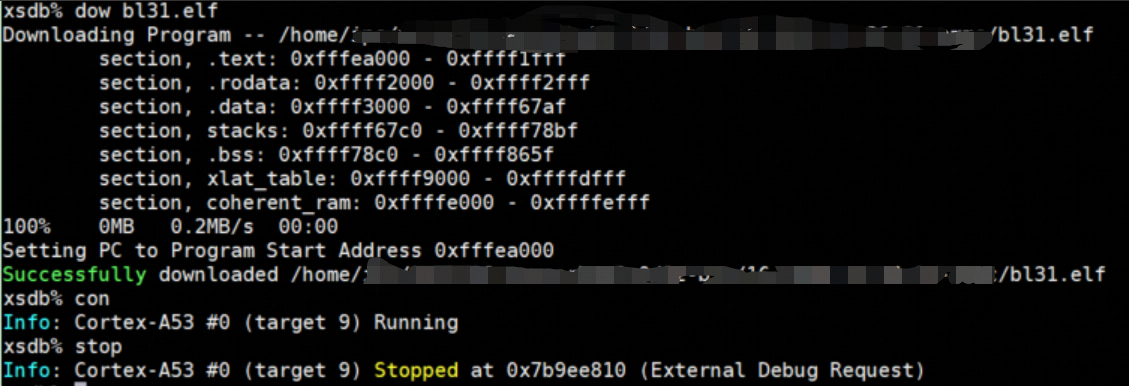
这时A53的调试串口会有如下log输出:

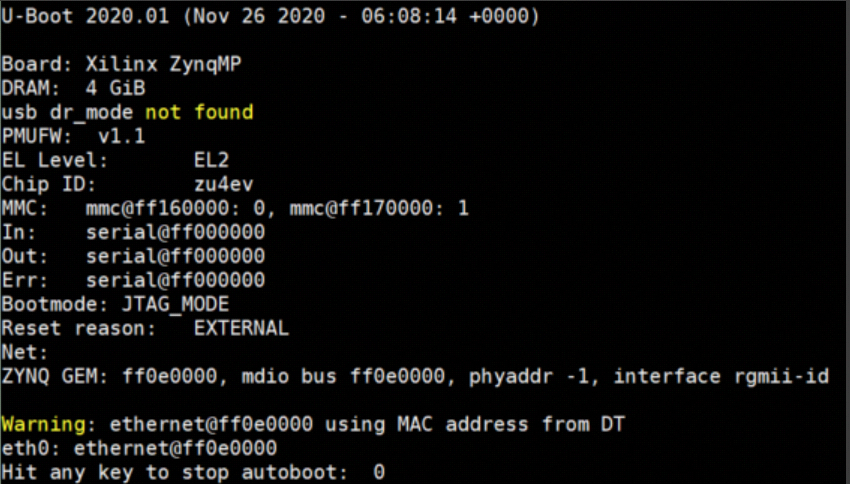
9,装载并运行U-BOOT,顺序输入下列指令:
dow u-boot.elf
con
这时A53的调试串口会有如下log输出:
到这里uboot就启动了,后面可以自由操作,比如擦写emmc、qspi flash等,其余部分可以参考其他文档了。
3,尾声
最重要的步骤是5和6,将PMU先跑起来,后面才能继续装载。
正确的参考文档是ug1209,https://www.xilinx.com/support/documentation/sw_manuals/xilinx2020_1/ug1209-embedded-design-tutorial.pdf。
推荐阅读