Flutter中如何使用WillPopScope的示例代码
- 作者: 獬豸烤肉
- 来源: 51数据库
- 2022-03-31
在flutter中如何实现点击2次back按钮退出app,如何实现app中多个route(路由),如何实现back按钮只退出指定页面,此篇文章将告诉你。
willpopscope
willpopscope用于处理是否离开当前页面,在flutter中有多种方式可以离开当前页面,比如appbar、cupertinonavigationbar上面的返回按钮,点击将会回到前一个页面,在android手机上点击实体(虚拟)返回按钮,也将会回到前一个页面,此功能对于ios程序员来说可能特别容易忽略。
以下几种情况我们会用到willpopscope:
- 需要询问用户是否退出。
- app中有多个navigator,想要的是让其中一个 navigator 退出,而不是直接让在 widget tree 底层的 navigator 退出。
询问用户是否退出
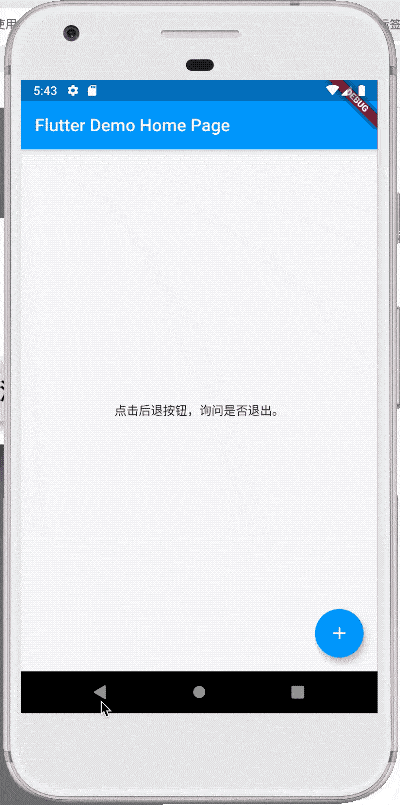
在android app中最开始的页面点击后退按钮,默认会关闭当前activity并回到桌面,我们希望此时弹出对话框或者给出提示“再次点击退出”,避免用户的误操作。
willpopscope(
onwillpop: () async => showdialog(
context: context,
builder: (context) =>
alertdialog(title: text('你确定要退出吗?'), actions: <widget>[
raisedbutton(
child: text('退出'),
onpressed: () => navigator.of(context).pop(true)),
raisedbutton(
child: text('取消'),
onpressed: () => navigator.of(context).pop(false)),
])),
child: container(
alignment: alignment.center,
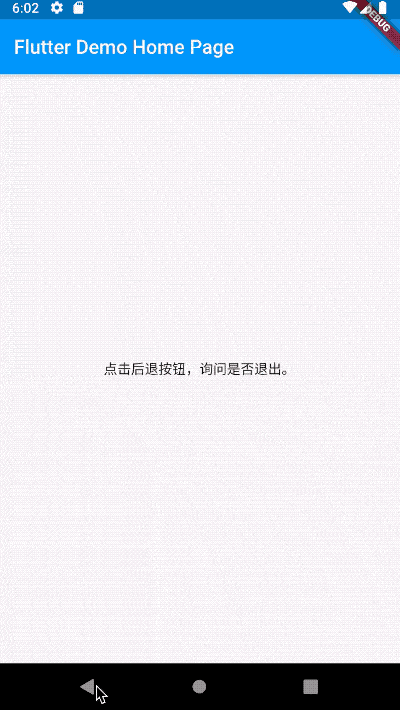
child: text('点击后退按钮,询问是否退出。'),
))
我们也可以把效果做成快速点击2次退出:
datetime _lastquittime;
willpopscope(
  onwillpop: () async {
   if (_lastquittime == null ||
     datetime.now().difference(_lastquittime).inseconds > 1) {
    print('再按一次 back 按钮退出');
    scaffold.of(context)
      .showsnackbar(snackbar(content: text('再按一次 back 按钮退出')));
    _lastquittime = datetime.now();
    return false;
   } else {
    print('退出');
    navigator.of(context).pop(true);
    return true;
   }
  },
  child: container(
   alignment: alignment.center,
   child: text('点击后退按钮,询问是否退出。'),
  ))
app中有多个navigator
我们的app通常是在materialapp和cupertinoapp下,materialapp和cupertinoapp本身有一个navigator,所以默认情况下调用navigator.pop或者navigator.push就是在操作此navigator。不过在一些情况下,我们希望有自己定义的navigator,比如如下场景:
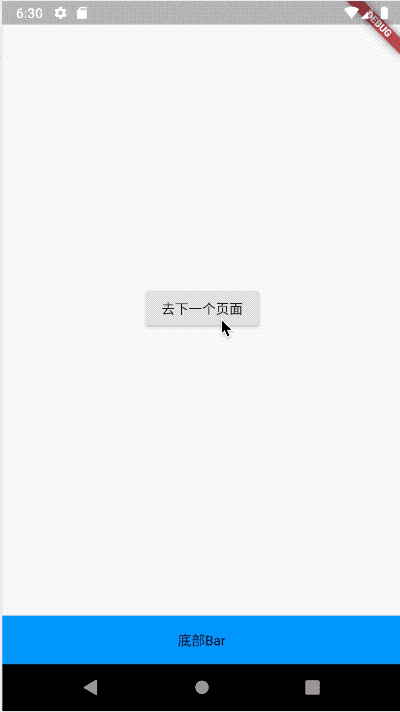
- 在页面底部有一个常驻bar,其上展示内容,这个常驻bar就需要一个自己的navigator。
- 在使用tabview、bottomnavigationbar、cupertinotabview这些组件时,希望有多个tab,但每个tab中有自己的导航行为,这时需要给每一个tab加一个navigator。
首页:
class myhomepage extends statefulwidget {
 myhomepage({key key, this.title}) : super(key: key);

 final string title;

 @override
 _myhomepagestate createstate() => _myhomepagestate();
}

class _myhomepagestate extends state<myhomepage> {

 globalkey<navigatorstate> _key = globalkey();

 @override
 widget build(buildcontext context) {
  return scaffold(
   body: willpopscope(
     onwillpop: () async {
      if (_key.currentstate.canpop()) {
       _key.currentstate.pop();
       return false;
      }
      return true;
     },
     child: column(
      children: <widget>[
       expanded(
        child: navigator(
         key: _key,
         ongenerateroute: (routesettings settings) =>
           materialpageroute(builder: (context) {
          return onepage();
         }),
        ),
       ),
       container(
        height: 50,
        color: colors.blue,
        alignment: alignment.center,
        child: text('底部bar'),
       )
      ],
     )),
  );
 }
}
第一个页面:
class onepage extends statelesswidget {
 @override
 widget build(buildcontext context) {
  return scaffold(
   body: center(
    child: container(
     child: raisedbutton(
      child: text('去下一个页面'),
      onpressed: () {
       navigator.push(context, materialpageroute(builder: (context) {
        return twopage();
       }));
      },
     ),
    ),
   ),
  );
 }
}
第二个页面:
class twopage extends statelesswidget {
 @override
 widget build(buildcontext context) {
  return scaffold(
   body: center(
    child: container(
     child: text('这是第二个页面'),
    ),
   ),
  );
 }
}
使用tabview、bottomnavigationbar、cupertinotabview这些组件时也是一样的原理,只需在每一个tab中加入navigator,不要忘记指定key。
总结
到此这篇关于flutter中如何使用willpopscope的文章就介绍到这了,更多相关flutter使用willpopscope内容请搜索以前的文章或继续浏览下面的相关文章希望大家以后多多支持!