将WEB日志导入到MongoDB数据库中
- 作者: 你大爷的闺蜜
- 来源: 51数据库
- 2020-08-16
1. mysql将WEB服务器日志通过管道处理然后写入数据库 处理程序源码
$ vim match.d
import std.regex;
import std.stdio;
import std.string;
import std.array;

void main()
{
    // nginx
	//auto r = regex(`^(\S+) (\S+) (\S+) \[(.+)\] "([^"]+)" ([0-9]{3}) ([0-9]+) "([^"]+)" "([^"]+)" "([^"]+)"`);

	// apache2
	auto r = regex(`^(\S+) (\S+) (\S+) \[(.+)\] "([^"]+)" ([0-9]{3}) ([0-9]+) "([^"]+)" "([^"]+)"`);

	foreach(line; stdin.byLine)
	{

		foreach(m; match(line, r)){
			//writeln(m.hit);
			auto c = m.captures;
			c.popFront();
			//writeln(c);
			auto value = join(c, "\",\"");
			auto sql = format("insert into log(remote_addr,unknow,remote_user,time_local,request,status,body_bytes_sent,http_referer,http_user_agent,http_x_forwarded_for) value(\"%s\");", value );
			writeln(sql);
		}
	}
}
编译 $ dmd match.d $ strip match $ ls match match.d match.o 简单用法 $ cat access.log | ./match 高级用法 $ cat access.log | match | mysql -hlocalhost -ulog -p123456 logging 实时处理日志,首先创建一个管道,寻该日志文件写入管道中。 cat 管道名 | match | mysql -hlocalhost -ulog -p123456 logging 这样就可以实现实时日志插入。 提示上面程序稍加修改即可实现Hbase, Hypertable 本版 2. Apache PipeApache 日志管道过滤 CustomLog "| /srv/match >> /tmp/access.log" combined
<VirtualHost *:80>
        ServerAdmin webmaster@localhost

        #DocumentRoot /var/www
        DocumentRoot /www
        <Directory />
                Options FollowSymLinks
                AllowOverride None
        </Directory>
        #<Directory /var/www/>
        <Directory /www/>
                Options Indexes FollowSymLinks MultiViews
                AllowOverride None
                Order allow,deny
                allow from all
        </Directory>

        ScriptAlias /cgi-bin/ /usr/lib/cgi-bin/
        <Directory "/usr/lib/cgi-bin">
                AllowOverride None
                Options +ExecCGI -MultiViews +SymLinksIfOwnerMatch
                Order allow,deny
                Allow from all
        </Directory>

        ErrorLog ${APACHE_LOG_DIR}/error.log

        # Possible values include: debug, info, notice, warn, error, crit,
        # alert, emerg.
        LogLevel warn

        #CustomLog ${APACHE_LOG_DIR}/access.log combined
        CustomLog "| /srv/match >> /tmp/access.log" combined

    Alias /doc/ "/usr/share/doc/"
    <Directory "/usr/share/doc/">
        Options Indexes MultiViews FollowSymLinks
        AllowOverride None
        Order deny,allow
        Deny from all
        Allow from 127.0.0.0/255.0.0.0 ::1/128
    </Directory>

</VirtualHost>
经过管道转换过的日志效果
$ tail /tmp/access.log
insert into log(remote_addr,unknow,remote_user,time_local,request,status,body_bytes_sent,http_referer,http_user_agent,http_x_forwarded_for) value("192.168.6.30","-","-","21/Mar/2013:16:11:00 +0800","GET / HTTP/1.1","304","208","-","Mozilla/5.0 (Windows NT 6.1; WOW64) AppleWebKit/537.22 (KHTML, like Gecko) Chrome/25.0.1364.172 Safari/537.22");
insert into log(remote_addr,unknow,remote_user,time_local,request,status,body_bytes_sent,http_referer,http_user_agent,http_x_forwarded_for) value("192.168.6.30","-","-","21/Mar/2013:16:11:00 +0800","GET /favicon.ico HTTP/1.1","404","501","-","Mozilla/5.0 (Windows NT 6.1; WOW64) AppleWebKit/537.22 (KHTML, like Gecko) Chrome/25.0.1364.172 Safari/537.22");
insert into log(remote_addr,unknow,remote_user,time_local,request,status,body_bytes_sent,http_referer,http_user_agent,http_x_forwarded_for) value("192.168.6.30","-","-","21/Mar/2013:16:11:00 +0800","GET / HTTP/1.1","304","208","-","Mozilla/5.0 (Windows NT 6.1; WOW64) AppleWebKit/537.22 (KHTML, like Gecko) Chrome/25.0.1364.172 Safari/537.22");
3. Log format通过定义LogFormat可以直接输出SQL形式的日志 Apache
LogFormat "%v:%p %h %l %u %t \"%r\" %>s %O \"%{Referer}i\" \"%{User-Agent}i\"" vhost_combined
LogFormat "%h %l %u %t \"%r\" %>s %O \"%{Referer}i\" \"%{User-Agent}i\"" combined
LogFormat "%h %l %u %t \"%r\" %>s %O" common
LogFormat "%{Referer}i -> %U" referer
LogFormat "%{User-agent}i" agent
Nginx
    log_format  main  '$remote_addr - $remote_user [$time_local] "$request" '
                      '$status $body_bytes_sent "$http_referer" '
                      '"$http_user_agent" "$http_x_forwarded_for"';
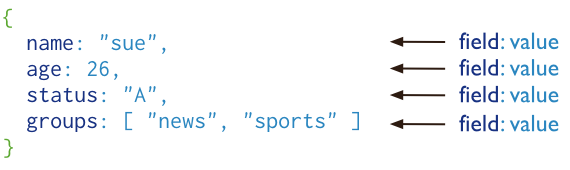
但对于系统管理员使用grep,awk,sed,sort,uniq分析时造成一定的麻烦。所以我建议仍然采用正则分解 4. 日志导入到 MongoDB# rpm -Uvh http://dl.fedoraproject.org/pub/epel/6/x86_64/epel-release-6-8.noarch.rpm # yum install mongodb D语言日志处理程序
import std.regex;
//import std.range;
import std.stdio;
import std.string;
import std.array;

void main()
{
	// nginx
	auto r = regex(`^(\S+) (\S+) (\S+) \[(.+)\] "([^"]+)" ([0-9]{3}) ([0-9]+) "([^"]+)" "([^"]+)" "([^"]+)"`);
	// apache2
	//auto r = regex(`^(\S+) (\S+) (\S+) \[(.+)\] "([^"]+)" ([0-9]{3}) ([0-9]+) "([^"]+)" "([^"]+)"`);
	foreach(line; stdin.byLine)
	{
		//writeln(line);
		//auto m = match(line, r);
		foreach(m; match(line, r)){
			//writeln(m.hit);
			auto c = m.captures;
			c.popFront();
			//writeln(c);
			/*
			SQL
			auto value = join(c, "\",\"");
			auto sql = format("insert into log(remote_addr,unknow,remote_user,time_local,request,status,body_bytes_sent,http_referer,http_user_agent,http_x_forwarded_for) value(\"%s\");", value );
			writeln(sql);
			*/
			// MongoDB
			string bson = format("db.logging.access.save({
						'remote_addr': '%s',
						'remote_user': '%s',
						'time_local': '%s',
						'request': '%s',
						'status': '%s',
						'body_bytes_sent':'%s',
						'http_referer': '%s',
						'http_user_agent': '%s',
						'http_x_forwarded_for': '%s'
						})",
						c[0],c[2],c[3],c[4],c[5],c[6],c[7],c[8],c[9]
						);
			writeln(bson);

		}
	}

}
变异处理程序 dmd mlog.d 用法 cat /var/log/nginx/access.log | mlog | mongo 192.169.0.5/logging -uxxx -pxxx 处理压错过的日志 # zcat /var/log/nginx/*.access.log-*.gz | /srv/weblog | mongo 192.168.6.1/logging -uneo -pchen |
推荐阅读