Angular17之Angular自定义指令详解
- 作者: 微笑那个54603392
- 来源: 51数据库
- 2021-08-09
1 什么是html
html文档就是一个纯文本文件,该文件包含了html元素、css样式以及javascript代码;html元素是由标签呈现,浏览器会为每个标签创建带有属性的dom对象,浏览器通过渲染这些dom节点来呈现内容,用户在浏览器中看到的内容就是浏览器渲染dom对象后的结果。
2 指令的分类
组件、属性指令、结构性指令
3 指定义指令常用到的一些常量
3.1 directive
用于装饰控制器类来指明该控制器类是一个自定义指令控制器类
3.2 elementref
作为dom对象的引用使用,通过构造器进行依赖注入,它的实例代表标注有自定义指令那个元素的dom对象;每个标注了自定义指令的元素都会自动拥有一个elementref对象来作为该元素dom对象的引用(前提:在自定义指令的控制器中依赖注入了elementref)
3.3 render2
render2的实例是用来操作dom节点的,因为angular不推荐直接操作dom节点;render2是从angular4才开始支持的,之前的版本是使用的render;每个标注有自定义指令的元素都会拥有一个render2实例来操作该元素的dom属性(前提:在自定义指令的控制器中依赖注入了render2)
3.4 hostlistener
用于装饰事件触发方法的注解
4 自定义属性指令
一个自定义的属性指令需要一个有@directive装饰器进行装饰的控制器类
import { directive } from '@angular/core';
@directive({
 selector: '[appdirectivetest02]'
})
export class directivetest02directive {
 constructor() { }
}
4.1 实现自定义属性指令
4.1.1 创建自定义属性指令控制类
技巧01:创建一个模块来专门放自定义指令
ng g d directive/test/directive-test02 --spec=false --module=directive
4.1.2 在控制器类中依赖注入elementref
constructor(
 private el: elementref
 ) {}
4.1.3 通过elementref实例改变标有自定义指令元素对应的dom对象的背景颜色
 ngoninit() {
 this.el.nativeelement.style.backgroundcolor = 'skyblue';
 }
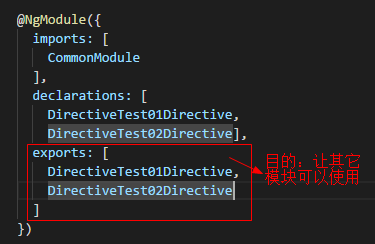
4.1.3 在自定义指令模块中指定exports
import { ngmodule } from '@angular/core';
import { commonmodule } from '@angular/common';
import { directivetest01directive } from './test/directive-test01.directive';
import { sharedmodule } from '../shared/shared.module';
import { directivetest02directive } from './test/directive-test02.directive';
@ngmodule({
 imports: [
 commonmodule
 ],
 declarations: [
 directivetest01directive,
 directivetest02directive],
 exports: [
 directivetest01directive,
 directivetest02directive
 ]
})
export class directivemodule { }
4.1.4 将自定义指令模块导入到需要用到指定指令的组件所在的模块中
技巧01:自定义指令一般会被多次用到,所以一般会将自定义指令模块导入到共享模块在从共享模块导出,这样其它模块只需要导入共享模块就可以啦
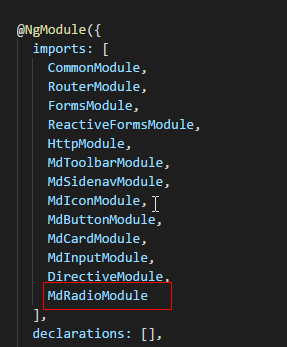
import { ngmodule } from '@angular/core';
import { commonmodule } from '@angular/common';
import { routermodule } from '@angular/router';
import {
 mdtoolbarmodule,
 mdsidenavmodule,
 mdiconmodule,
 mdbuttonmodule,
 mdcardmodule,
 mdinputmodule,
 mdradiomodule,
 mdradiobutton
 } from '@angular/material';
import { formsmodule, reactiveformsmodule } from '@angular/forms';
import { httpmodule } from '@angular/http';
import { directivemodule } from '../directive/directive.module';
@ngmodule({
 imports: [
 commonmodule,
 routermodule,
 formsmodule,
 reactiveformsmodule,
 httpmodule,
 mdtoolbarmodule,
 mdsidenavmodule,
 mdiconmodule,
 mdbuttonmodule,
 mdcardmodule,
 mdinputmodule,
 directivemodule,
 mdradiomodule
 ],
 declarations: [],
 exports: [
 commonmodule,
 routermodule,
 formsmodule,
 reactiveformsmodule,
 httpmodule,
 mdtoolbarmodule,
 mdsidenavmodule,
 mdiconmodule,
 mdbuttonmodule,
 mdcardmodule,
 mdinputmodule,
 directivemodule,
 mdradiobutton
 ]
})
export class sharedmodule { }
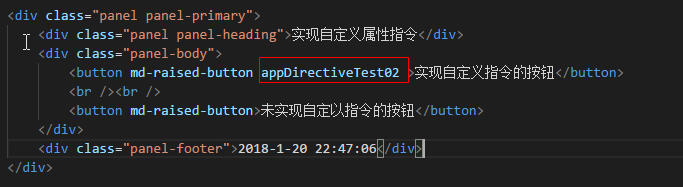
4.1.5 在组件中使用自定组件对应的选择器即可
自定义指令的选择器是由@directive装饰器的selector元数据指定的

在元素中直接标注自定义指令的选择器就行啦
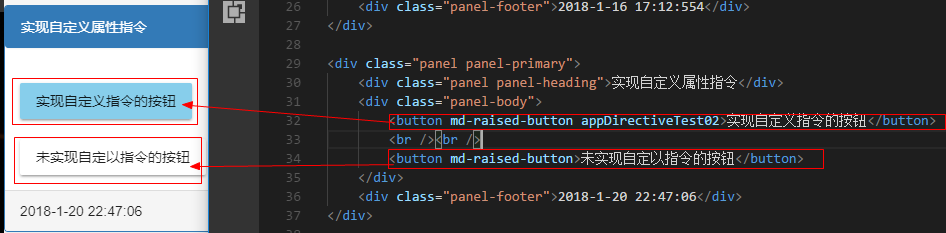
<div class="panel panel-primary">
 <div class="panel panel-heading">实现自定义属性指令</div>
 <div class="panel-body">
 <button md-raised-button appdirectivetest02>实现自定义指令的按钮</button>
 <br /><br />
 <button md-raised-button>未实现自定以指令的按钮</button>
 </div>
 <div class="panel-footer">2018-1-20 22:47:06</div>
</div>
4.1.6 代码汇总
import { directive, elementref } from '@angular/core';
import { oninit } from '../../../../node_modules/_@angular_core@4.4.6@@angular/core/src/metadata/lifecycle_hooks';
@directive({
 selector: '[appdirectivetest02]'
})
export class directivetest02directive implements oninit {
 constructor(
 private el: elementref
 ) {}
 ngoninit() {
 this.el.nativeelement.style.backgroundcolor = 'skyblue';
 }
}
4.2 给自定义属性指令绑定输入属性
在4.1中实现的自定义属性指令中背景颜色是写死的不能更改,我们可以给指令绑定输入属性实现数据传递,从而达到动态改变的目的
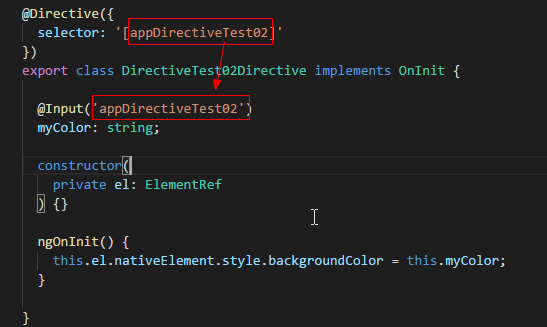
4.2.1 在自定义属性指令的控制器中添加一个输入属性mycolor
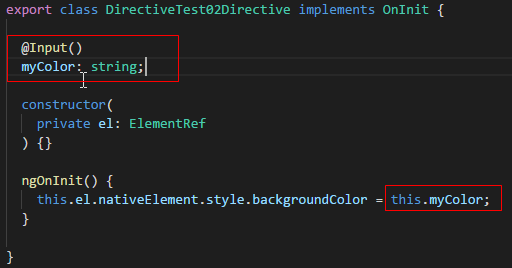
import { directive, elementref, oninit, input } from '@angular/core';
@directive({
 selector: '[appdirectivetest02]'
})
export class directivetest02directive implements oninit {
 @input()
 mycolor: string;
 constructor(
 private el: elementref
 ) {}
 ngoninit() {
 this.el.nativeelement.style.backgroundcolor = this.mycolor;
 }
}
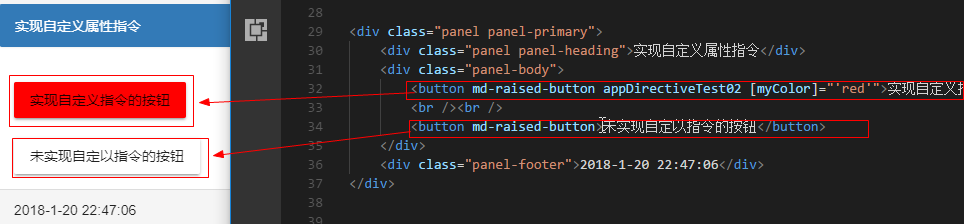
4.2.2 在组件中给mycolor属性赋值
技巧01:在给输入属性赋值时,等号右边如果不是一个变量就需要用单引号括起来
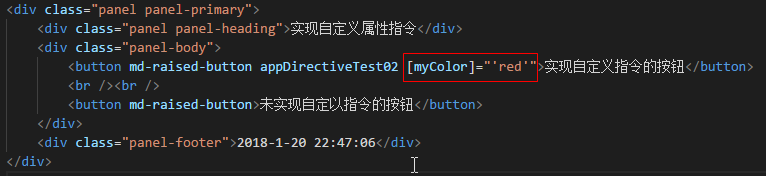
<div class="panel panel-primary">
 <div class="panel panel-heading">实现自定义属性指令</div>
 <div class="panel-body">
 <button md-raised-button appdirectivetest02 [mycolor]="'red'">实现自定义指令的按钮</button>
 <br /><br />
 <button md-raised-button>未实现自定以指令的按钮</button>
 </div>
 <div class="panel-footer">2018-1-20 22:47:06</div>
</div>
4.2.3 效果展示
4.2.4 改进
可以通过自定义属性指令的选择器来实现数据传输
》利用自定义属性指令的选择器作为输入属性mycolor输入属性的别名
》在组件中直接利用自定义指令的选择器作为输入属性
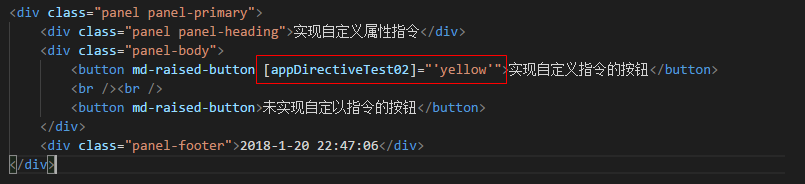
<div class="panel panel-primary">
 <div class="panel panel-heading">实现自定义属性指令</div>
 <div class="panel-body">
 <button md-raised-button [appdirectivetest02]="'yellow'">实现自定义指令的按钮</button>
 <br /><br />
 <button md-raised-button>未实现自定以指令的按钮</button>
 </div>
 <div class="panel-footer">2018-1-20 22:47:06</div>
</div>
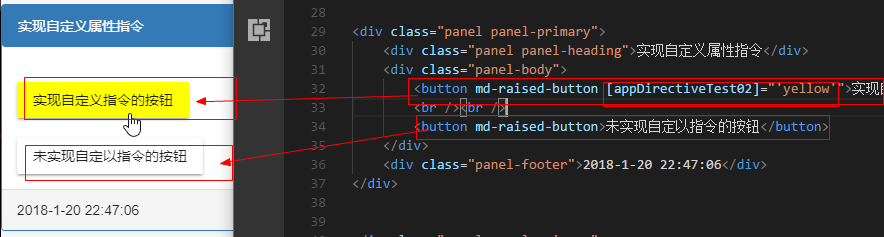
》 效果展示
4.3 响应用户操作
在自定义属性指令中通过监听dom对象事件来进行一些操作
4.2.1 引入 hostlistener 注解并编写一个方法
技巧01:hostlistener注解可以传入两个参数
参数1 -> 需要监听的事件名称
参数2 -> 事件触发时传递的方法
 @hostlistener('click', ['$event'])
 onclick(ev: event) {  }
4.2.2 在方法中实现一些操作
@hostlistener('click', ['$event'])
 onclick(ev: event) {
 if (this.el.nativeelement === ev.target) {
 if (this.el.nativeelement.style.backgroundcolor === 'green') {
 this.el.nativeelement.style.backgroundcolor = 'skyblue';
 } else {
 this.el.nativeelement.style.backgroundcolor = 'green';
 }
 }
 // if (this.el.nativeelement.style.backgroundcolor === 'yellow') {
 // this.el.nativeelement.style.backgroundcolor = 'green';
 // } else {
 // this.el.nativeelement.style.backgroundcolor = 'yellow';
 // }
 }
4.2.3 在组件中标记自定义属性指令的选择器就可以啦
<div class="panel panel-primary">
 <div class="panel panel-heading">实现自定义属性指令</div>
 <div class="panel-body">
 <button md-raised-button appdirectivetest02 >实现自定义指令的按钮</button>
 <br /><br />
 <button md-raised-button>未实现自定以指令的按钮</button>
 </div>
 <div class="panel-footer">2018-1-20 22:47:06</div>
</div>
4.2.4 代码汇总
import { directive, elementref, oninit, input, hostlistener } from '@angular/core';
@directive({
 selector: '[appdirectivetest02]'
})
export class directivetest02directive implements oninit {
 constructor(
 private el: elementref
 ) {}
 ngoninit() {
 }
 @hostlistener('click', ['$event'])
 onclick(ev: event) {
 if (this.el.nativeelement === ev.target) {
 if (this.el.nativeelement.style.backgroundcolor === 'green') {
 this.el.nativeelement.style.backgroundcolor = 'skyblue';
 } else {
 this.el.nativeelement.style.backgroundcolor = 'green';
 }
 }
 // if (this.el.nativeelement.style.backgroundcolor === 'yellow') {
 // this.el.nativeelement.style.backgroundcolor = 'green';
 // } else {
 // this.el.nativeelement.style.backgroundcolor = 'yellow';
 // }
 }
}
总结
以上所述是小编给大家介绍的angular17之angular自定义指令详解,希望对大家有所帮助