iOS tableview实现顶部拉伸效果
- 作者: 嘘_告诉你个秘密_安倍是条狗
- 来源: 51数据库
- 2021-09-21
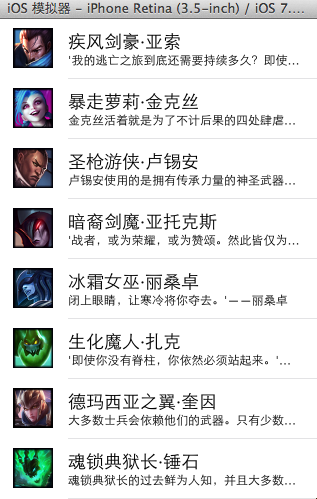
本文实例为大家分享了ios tableview头部拉伸效果展示的具体代码,例如探探个人信息界面拉伸效果,下拉头像放大
代码:
//
// personcontroller.m
// spread
//
// created by qiuxuewei on 16/3/21.
// copyright © 2016年 邱学伟. all rights reserved.
//

#import "personcontroller.h"

@interface personcontroller ()<uitableviewdatasource, uitableviewdelegate, uiscrollviewdelegate>{

}

//属性列表
/** 顶部图片视图 */
@property (nonatomic, strong) uiimageview *headerimageview;
@property (nonatomic, strong) uiview *headerbackview;
/** 个人信息界面 */
@property (nonatomic, strong) uitableview *tableview;

@end

@implementation personcontroller
#pragma mark - 懒加载
-(uiview *)headerbackview{
 if (_headerbackview == nil) {
  _headerbackview = [[uiview alloc] initwithframe:cgrectmake(0, 0, kscreenwidth, 200)];
  [_headerbackview setbackgroundcolor:[uicolor lightgraycolor]];
 }
 return _headerbackview;
}
-(uiimageview *)headerimageview{
 if (_headerimageview == nil) {
  _headerimageview = [[uiimageview alloc] init];
  [_headerimageview setimage:[uiimage imagenamed:@"邱_生活.jpg"]];
  [_headerimageview setbackgroundcolor:[uicolor greencolor]];
  [_headerimageview setcontentmode:uiviewcontentmodescaleaspectfill];
  [_headerimageview setclipstobounds:yes];
 }
 return _headerimageview;
}
-(uitableview *)tableview{
 if (_tableview == nil) {
  _tableview = [[uitableview alloc] initwithframe:cgrectmake(0, 0, kscreenwidth, kscreenheight) style:uitableviewstylegrouped];
  [_tableview setdatasource:self];
  [_tableview setdelegate:self];
 }
 return _tableview;
}

- (void)viewdidload {
 [super viewdidload];
 // do any additional setup after loading the view from its nib.
 //添加子视图
 [self addchildviews];
}
#pragma mark - 类内方法
//添加子视图
-(void)addchildviews{
 //添加表格
 [self.view addsubview:self.tableview];
 //添加头像图片
 [self addheaderimageview];
}
//添加头像
-(void)addheaderimageview{
 [self.tableview settableheaderview:self.headerbackview];
 [self.headerimageview setframe:self.headerbackview.bounds];
 [self.headerbackview addsubview:self.headerimageview];
}


#pragma mark - uitableviewdatasource
- (nsinteger)tableview:(uitableview *)tableview numberofrowsinsection:(nsinteger)section{
 return 4;
}

-(nsinteger)numberofsectionsintableview:(uitableview *)tableview{
 return 2;
}

-(cgfloat)tableview:(uitableview *)tableview heightforrowatindexpath:(nsindexpath *)indexpath{
 return 64;
}

-(void)tableview:(uitableview *)tableview didselectrowatindexpath:(nsindexpath *)indexpath{
 // 不加此句时,在二级栏目点击返回时,此行会由选中状态慢慢变成非选中状态。
 // 加上此句,返回时直接就是非选中状态。
 [tableview deselectrowatindexpath:indexpath animated:yes];
}

//初始化cell
-(uitableviewcell *)tableview:(uitableview *)tableview cellforrowatindexpath:(nsindexpath *)indexpath{

 static nsstring *id = @"cell";
 uitableviewcell *cell = [tableview dequeuereusablecellwithidentifier:id];
 if (!cell) {
  cell = [[uitableviewcell alloc] initwithstyle:uitableviewcellstylesubtitle reuseidentifier:id];
 }
 //初始化cell数据!
 [cell.textlabel settext:@"阿伟"];
 [cell.detailtextlabel settext:@"2016-03-22"];

 return cell;
}

//滚动tableview 完毕之后
-(void)scrollviewdidscroll:(uiscrollview *)scrollview{

 //图片高度
 cgfloat imageheight = self.headerbackview.frame.size.height;
 //图片宽度
 cgfloat imagewidth = kscreenwidth;
 //图片上下偏移量
 cgfloat imageoffsety = scrollview.contentoffset.y;

 nslog(@"图片上下偏移量 imageoffsety:%f ->",imageoffsety);


 //上移
 if (imageoffsety < 0) {
  cgfloat totaloffset = imageheight + abs(imageoffsety);
  cgfloat f = totaloffset / imageheight;

  self.headerimageview.frame = cgrectmake(-(imagewidth * f - imagewidth) * 0.5, imageoffsety, imagewidth * f, totaloffset);
 }

// //下移
// if (imageoffsety > 0) {
//  cgfloat totaloffset = imageheight - abs(imageoffsety);
//  cgfloat f = totaloffset / imageheight;
//
//  [self.headerimageview setframe:cgrectmake(-(imagewidth * f - imagewidth) * 0.5, imageoffsety, imagewidth * f, totaloffset)];
// }


}


- (void)didreceivememorywarning {
 [super didreceivememorywarning];
 // dispose of any resources that can be recreated.
}

/*
#pragma mark - navigation

// in a storyboard-based application, you will often want to do a little preparation before navigation
- (void)prepareforsegue:(uistoryboardsegue *)segue sender:(id)sender {
 // get the new view controller using [segue destinationviewcontroller].
 // pass the selected object to the new view controller.
}
*/

@end
以上就是本文的全部内容,希望对大家的学习有所帮助,也希望大家多多支持。
推荐阅读