开发一个提供给别人使用的SDK
- 作者: 咖咖爱睡觉
- 来源: 51数据库
- 2021-08-18
摘要
本贴简要概述了如何开发一个可以供别人使用SDK包,该包主要集成了AIDL通讯,并提供服务,使得第三方集成了该SDK包后,无需再新建AIDL模板即可与SDK进行通讯,获取到相应的服务。同时,开发个第三方app使用该SDK,并用锁同步回调机制。
要点
- SDK开发时分模块:项目集成两个module,1个是提供服务的app模块、一个是对外的SDK模块。
- SDK模块建立AIDL模板,在第三方引入后,也就有了AIDL通讯接口。
- 第三方app集成SDK后用ReentryLock同步回调结果,模拟服务方提供服务时出现异常场景,尝试重新调用AIDL接口。
实现方法
1. SDK模块
1.1 新建SDK module,名为mysdk
修改插件
apply plugin: 'com.android.library'
删除 applicationId
applicationId "com.example.mysdk"
1.2 新增AIDL模板 IClientInterface.aidl
本模块中,类com.example.myclient.MyClient提供对外接口,所以AIDL也为其对应的包名。注意ILogInListener为自定义回调接口,需import进对应的接口。
// IClientInterface.aidl
package com.example.myclient;

// Declare any non-default types here with import statements
import com.example.myclient.ILogInListener;

interface IClientInterface {
    /**
     * Demonstrates some basic types that you can use as parameters
     * and return values in AIDL.
     */
    void login(String userName , String passWord, in ILogInListener listener);  // 登录,有回调监听器,如果登录失败可回调至使用SDK使用方

    void logout();  // 登出

    boolean isLogin();  // 是否登录
}
该客户端接口有自定义的回调接口ILogInListener,所以还需要新建AIDL模板ILogInListener.aidl,如下
// ILogInListener.aidl
package com.example.myclient;

// Declare any non-default types here with import statements

interface ILogInListener {
    /**
     * Demonstrates some basic types that you can use as parameters
     * and return values in AIDL.
     */
    void onResult(boolean isSuccess); // 回调函数,可通知使用方登录是否成功
}
模板建完后得build一下,Android studio会自动帮你编译好AIDl代码。
1.3 新建对外暴露接口类
在模块中,我们新建类MyClient.java
package com.example.myclient;

import android.content.ComponentName;
import android.content.Context;
import android.content.Intent;
import android.content.ServiceConnection;
import android.os.IBinder;
import android.os.RemoteException;
import android.util.Log;

public class MyClient {
    private final static String TAG = "MyClient";

    private Context mContext;

    private IClientInterface mClient;

    private boolean isConnected = false;

    private ServiceConnection mServiceConnection = new ServiceConnection() {
        @Override
        public void onServiceConnected(ComponentName name, IBinder service) {
            mClient = IClientInterface.Stub.asInterface(service);
            Log.i(TAG, "onServiceConnected");
            isConnected = true;
        }

        @Override
        public void onServiceDisconnected(ComponentName name) {
            Log.i(TAG, "onServiceDisconnected");
            isConnected = false;
        }
    };

    public MyClient(Context mContext) {
        this.mContext = mContext;
    }

    public void init() {
        Intent intent = new Intent();
        intent.setAction("com.example.myjar.action.TEST");
        intent.setComponent(new ComponentName("com.example.myjar", "com.example.myjar.MyService"));
        intent.setClassName("com.example.myjar", "com.example.myjar.MyService");
        Log.i(TAG, "start init");
        if (mContext != null) {
            Log.i(TAG, "init");
            mContext.bindService(intent, mServiceConnection, Context.BIND_AUTO_CREATE);
        }
    }

    public void login(String userName, String passWord, ILogInListener listener) {
        Log.i(TAG, "start login");
        Log.i(TAG, "isConnected " + isConnected);
        Log.i(TAG, "mClient==null? " + (mClient == null));

        if (isConnected && mClient != null) {
            try {
                Log.i(TAG, "login");
                mClient.login(userName, passWord, listener);
            } catch (RemoteException ex) {
                ex.printStackTrace();
            }
        }
    }

    public void logout() {
        if (isConnected) {
            try {
                mClient.logout();
            } catch (RemoteException ex) {
                ex.printStackTrace();
            }
        }
    }

    public void disConnect() {
        if (isConnected) {
            if (mContext != null) {
                mContext.unbindService(mServiceConnection);
            }
        }
    }
}
最后,我们在右边的Gradle对本模块build一下就有相应的sdk出现了,就能提供给第三方应用使用了。
2. APP模块
2.1 在build.gradle新建依赖
dependencies {
	implementation project(path: ':mysdk')
}
2.2 AndroidManifest.xml注册服务
<service android:name=".MyService"
            android:enabled="true"
            android:exported="true">
            <intent-filter>
                <action android:name="com.example.myjar.action.TEST"/>
            </intent-filter>
        </service>
2.3 新建服务类
服务类为com.example.myjar.MyService
package com.example.myjar;

import android.app.Service;
import android.content.Intent;
import android.os.IBinder;
import android.os.RemoteException;
import android.os.SystemClock;
import android.util.Log;

import androidx.annotation.Nullable;

import com.example.myclient.IClientInterface;
import com.example.myclient.ILogInListener;

public class MyService extends Service {
    private final static String TAG = "MyService";

    private IBinder mBinder = new IClientInterface.Stub() {
        @Override
        public void login(String userName, String passWord, ILogInListener listener) throws RemoteException {
            if ("jack".equals(userName) && "123".equals(passWord)) {
                Log.i(TAG, "login success");
                if (listener != null) {
                    // 模拟耗时操作
                    SystemClock.sleep(3000);
                    listener.onResult(true);
                }
            } else {
                if (listener != null) {
                    // 模拟耗时操作
                    SystemClock.sleep(3000);
                    listener.onResult(false);
                }
            }
        }

        @Override
        public void logout() throws RemoteException {

        }

        @Override
        public boolean isLogin() throws RemoteException {
            return false;
        }
    };

    @Nullable
    @Override
    public IBinder onBind(Intent intent) {
        return mBinder;
    }
}
然后,在app模块build一下,就可以安装app到系统,提供服务。
3. 第三方应用,包名为com.example.myjartest
把步骤1的SDK build一下得到的sdk复制到第三方应用的libs目录下,然后步骤如下。
2.1 修改app.gradle
dependencies {
    implementation fileTree(dir: 'libs', include: ['*.jar','*.aar'])
}
同步下gradle,就可以使用SDK的接口功能了。
2.2 主函数
MainActivity.java
package com.example.myjartest;

import androidx.appcompat.app.AppCompatActivity;

import android.os.Bundle;
import android.os.RemoteException;
import android.util.Log;
import android.view.View;
import android.widget.Button;

import com.example.myclient.ILogInListener;
import com.example.myclient.MyClient;

import java.util.concurrent.locks.Condition;
import java.util.concurrent.locks.ReentrantLock;

public class MainActivity extends AppCompatActivity implements View.OnClickListener {
    private MyClient myClient;

    private Button mButton;

    private final static String TAG = "MyClient";

    private static boolean IS_LOGIN = false;

    private ReentrantLock lock = new ReentrantLock();

    private Condition condition = lock.newCondition();

    @Override
    protected void onCreate(Bundle savedInstanceState) {
        super.onCreate(savedInstanceState);
        setContentView(R.layout.activity_main);
        mButton = findViewById(R.id.connection);
        mButton.setOnClickListener(this);
        myClient = new MyClient(this);
        myClient.init();
    }

    @Override
    protected void onDestroy() {
        super.onDestroy();
        myClient.disConnect();
    }

    @Override
    public void onClick(View v) {
        Log.i(TAG, "start onClick");
        if (v.getId() == R.id.connection) {
            Log.i(TAG, "onClick");

            try {
                // 加锁,同步回调结果再重试登录
                lock.lock();
                while (!IS_LOGIN) {
                    // 模拟登录失败,一直重试登录
                    myClient.login("jack", "1234", new ILogInListener.Stub() {
                        @Override
                        public void onResult(boolean b) throws RemoteException {
                            try {
                                Log.i(TAG, "login is " + b);
                                lock.lock();
                                IS_LOGIN = b;
                                condition.signalAll();
                                Log.i(TAG, "condition signalAll");
                            } catch (Exception ex) {
                                Log.i(TAG, "onResult error");
                            } finally {
                                Log.i(TAG, "onResult lock.unlock");
                                lock.unlock();
                            }
                        }
                    });
                }
                condition.await();
                Log.i(TAG, "condition await");
            } catch (Exception ex) {
                Log.i(TAG, "login error");
            } finally {
                lock.unlock();
                Log.i(TAG, "login lock.unlock");
            }
        }
    }
}
2.3 布局文件
activity_main.xml
<?xml version="1.0" encoding="utf-8"?>
<androidx.constraintlayout.widget.ConstraintLayout xmlns:android="http://schemas.android.com/apk/res/android"
    xmlns:app="http://schemas.android.com/apk/res-auto"
    xmlns:tools="http://schemas.android.com/tools"
    android:layout_width="match_parent"
    android:layout_height="match_parent"
    tools:context=".MainActivity">

    <TextView
        android:id="@+id/helloWorld"
        android:layout_width="wrap_content"
        android:layout_height="wrap_content"
        android:text="Hello World!"
        app:layout_constraintBottom_toBottomOf="parent"
        app:layout_constraintLeft_toLeftOf="parent"
        app:layout_constraintRight_toRightOf="parent"
        app:layout_constraintTop_toTopOf="parent" />
    <Button
        android:id="@+id/connection"
        android:layout_width="wrap_content"
        android:layout_height="wrap_content"
        android:text="connection"
        app:layout_constraintBottom_toBottomOf="@id/helloWorld"
        app:layout_constraintLeft_toLeftOf="parent"
        app:layout_constraintRight_toRightOf="parent"
        app:layout_constraintTop_toTopOf="parent"/>

</androidx.constraintlayout.widget.ConstraintLayout>
3. 测试结果
连接成功后,由于是模拟登录失败,一直重试,所以会有一直打印的日志如下:
2021-01-17 23:50:53.658 15131-15131/? I/MyClient: start init
2021-01-17 23:50:53.658 15131-15131/? I/MyClient: init
2021-01-17 23:50:53.685 15131-15131/? I/MyClient: onServiceConnected
2021-01-17 23:50:59.543 15131-15131/com.example.myjartest I/MyClient: start onClick
2021-01-17 23:50:59.543 15131-15131/com.example.myjartest I/MyClient: onClick
// 重复打印
2021-01-17 23:50:59.544 15131-15131/com.example.myjartest I/MyClient: start login
2021-01-17 23:50:59.545 15131-15131/com.example.myjartest I/MyClient: isConnected true
2021-01-17 23:50:59.545 15131-15131/com.example.myjartest I/MyClient: mClient==null? false
2021-01-17 23:50:59.545 15131-15131/com.example.myjartest I/MyClient: login
2021-01-17 23:51:02.550 15131-15131/com.example.myjartest I/MyClient: login is false
2021-01-17 23:51:02.552 15131-15131/com.example.myjartest I/MyClient: condition signalAll
2021-01-17 23:51:02.552 15131-15131/com.example.myjartest I/MyClient: onResult lock.unlock
// 重复打印
2021-01-17 23:51:02.555 15131-15131/com.example.myjartest I/MyClient: start login
2021-01-17 23:51:02.556 15131-15131/com.example.myjartest I/MyClient: isConnected true
2021-01-17 23:51:02.556 15131-15131/com.example.myjartest I/MyClient: mClient==null? false
2021-01-17 23:51:02.556 15131-15131/com.example.myjartest I/MyClient: login
2021-01-17 23:51:05.563 15131-15131/com.example.myjartest I/MyClient: login is false
2021-01-17 23:51:05.564 15131-15131/com.example.myjartest I/MyClient: condition signalAll
2021-01-17 23:51:05.564 15131-15131/com.example.myjartest I/MyClient: onResult lock.unlock
...
参考https://blog.csdn.net/github_33304260/article/details/78606326
总结
你学会三个要点了吗?
推荐阅读
热点文章

android中Bitmap用法(显示,保存,缩放,旋转)实例分析
12

android 仿微信聊天气泡效果实现思路
1
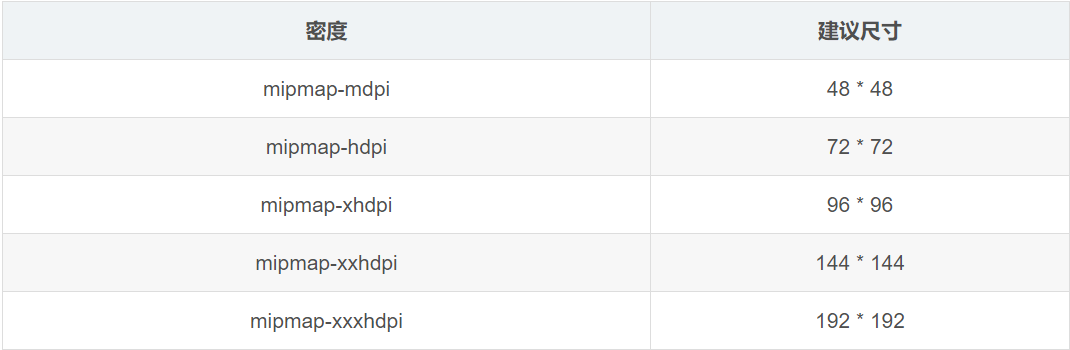
Android的尺度,drawable-xxxxxxx
2

Codeforces Round #656 (Div. 3) (C、D题)
1
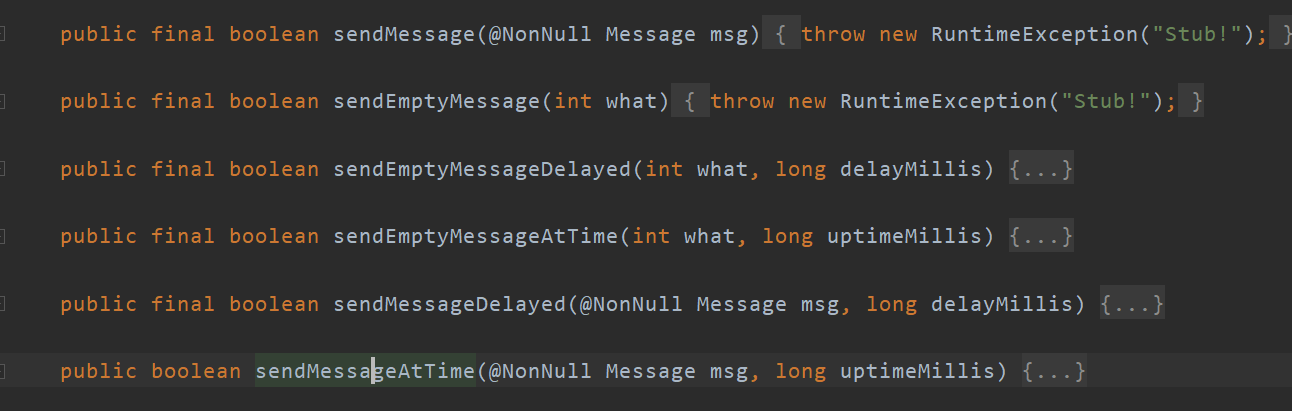
Android之handler异步消息处理机制解析
6

GridView中图片显示出现上下间距过大,左右图片显示类似瀑布流的问题
0
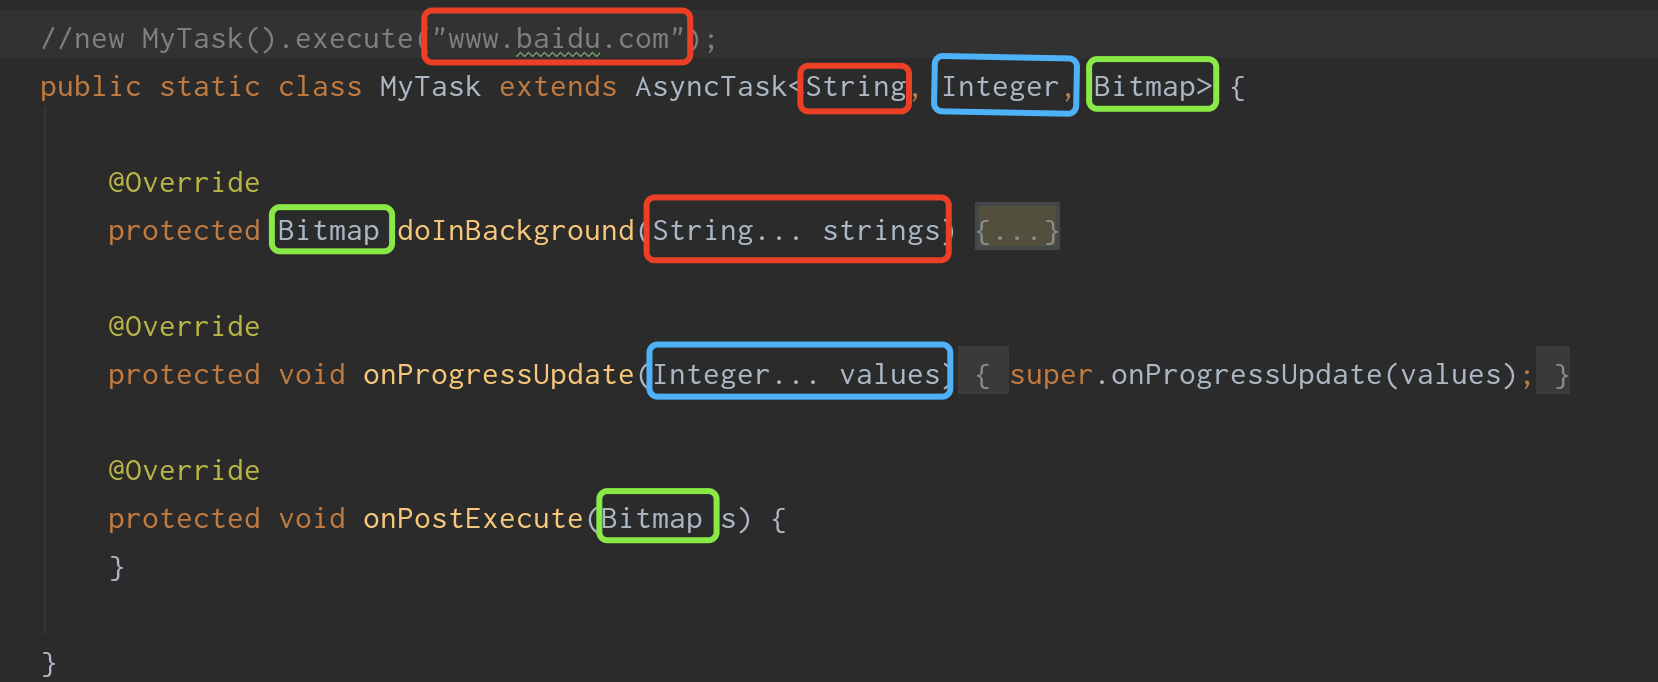
AsyncTask的简单使用
5
两个简单Fragment之间的通信(三种方式)
18
uboot修改设置boot参数命令
41
android中实现从相册中一次性获取多张图片与拍照,并将选中的图片显示出来
2
