Android App开发:Handler消息处理
- 作者: 快乐的小2鸟
- 来源: 51数据库
- 2021-08-14
Handler消息传递机制
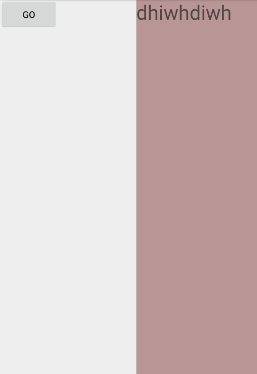
子线程不允许操作主线程的U界面
Handler是android中提供的一个消息处理的机制
1.在任意线程中发送消息
2.在主线程中获取并处理消息
package com.example;

import androidx.annotation.NonNull;
import androidx.appcompat.app.AppCompatActivity;

import android.os.Bundle;
import android.os.Handler;
import android.os.Message;
import android.view.View;
import android.widget.Button;
import android.widget.TextView;

public class MainActivity extends AppCompatActivity {

    @Override
    protected void onCreate(Bundle savedInstanceState) {
        super.onCreate(savedInstanceState);
        setContentView(R.layout.activity_main);
        TextView textView = findViewById(R.id.tv);
        Button button = findViewById(R.id.btn);
        Handler handler = new Handler(){
            @Override
            public void handleMessage(@NonNull Message msg) {
                super.handleMessage(msg);
                if (msg.what == 0x123){
                    textView.setText("你今天的努力是新云的伏;当下的付出,是明日的花开");

                }
            }
        };
        button.setOnClickListener(new View.OnClickListener() {
            @Override
            public void onClick(View v) {
                //创建线程
                Thread thread = new Thread(new Runnable() {
                    @Override
                    public void run() {
                        handler.sendEmptyMessage(0x123);//发送空消息
//                        textView.setText("你今天的努力是新云的伏;当下的付出,是明日的花开");
                    }
                });
                thread.start();//开启线程
            }
        });
    }
}
Message
Message对象的属性
arg1,arg2 整形
obj Object类型
replyTo 发送到何处
what 自定义的消息代码
创建Message对象
1.Message.obtain()
2.Handler.obtainMessage()
模拟手机淘宝使用Handler和Message实现轮播广告
<?xml version="1.0" encoding="utf-8"?>
<LinearLayout xmlns:android="http://schemas.android.com/apk/res/android"
    xmlns:app="http://schemas.android.com/apk/res-auto"
    xmlns:tools="http://schemas.android.com/tools"
    android:layout_width="match_parent"
    android:layout_height="match_parent"
    android:orientation="vertical"
    android:background="@drawable/taobao"
    tools:context=".MainActivity">

    <ViewFlipper
        android:id="@+id/vf"
        android:layout_width="match_parent"
        android:layout_height="wrap_content"/>


</LinearLayout>
package com.example;

import androidx.annotation.NonNull;
import androidx.appcompat.app.AppCompatActivity;

import android.os.Bundle;
import android.os.Handler;
import android.os.Message;
import android.view.animation.Animation;
import android.view.animation.AnimationUtils;
import android.widget.ImageView;
import android.widget.ViewFlipper;

public class MainActivity extends AppCompatActivity {
    private ViewFlipper flipper;
    private int[] images = new int[]{R.drawable.icon1,R.drawable.icon2,R.drawable.left
            ,R.drawable.like,R.drawable.line};
    private Animation[] animation = new Animation[2];
    private final int FLAG_MSG = 0x001;
    private Message message;
    @Override
    protected void onCreate(Bundle savedInstanceState) {
        super.onCreate(savedInstanceState);
        setContentView(R.layout.activity_main);
        flipper = findViewById(R.id.vf);
        for (int i = 0; i < images.length; i++) {
            ImageView imageView = new ImageView(this);
            imageView.setImageResource(images[i]);
            flipper.addView(imageView);
        }
         animation[0] = AnimationUtils.loadAnimation(this, R.anim.slide_in_right);
        animation[1] = AnimationUtils.loadAnimation(this, R.anim.slide_out_left);
        flipper.setInAnimation(animation[0]);
        flipper.setOutAnimation(animation[1]);
        message = Message.obtain();
        message.what = FLAG_MSG;
        handler.sendMessage(message);

    }
    Handler handler = new Handler(){
        @Override
        public void handleMessage(@NonNull Message msg) {
            super.handleMessage(msg);
            if (msg.what ==FLAG_MSG){
                flipper.showPrevious();
                message = handler.obtainMessage(FLAG_MSG);
                handler.sendMessageDelayed(message,3000);
            }
        }
    };
}
Looper
Looper对象的创建
handler在主线程中创建时,系统自动创建Looper对象
handler在子线程中创建时,手动创建Looper对象
子线程中创建Looper对象的步骤
1.初始化Looper对象prepare()
2.创建Handler对象new Handler()
3.启动Looper loop()
package com.example;

import android.os.Handler;
import android.os.Looper;
import android.os.Message;
import android.util.Log;

import androidx.annotation.NonNull;

public class LooperThread  extends Thread{
    private Handler handler;
    @Override
    public void run() {
        super.run();
        Looper.prepare();//初始化Looper对象
        handler = new Handler(){
            @Override
            public void handleMessage(@NonNull Message msg) {
                super.handleMessage(msg);
                Log.i("Looper",String.valueOf(msg.what));
            }
        };
        Message message = handler.obtainMessage();
        message.what = 0x7;
        handler.sendMessage(message);
        Looper.loop();//启动Looper
    }
}
package com.example;

import androidx.appcompat.app.AppCompatActivity;

import android.os.Bundle;

public class MainActivity extends AppCompatActivity {

    @Override
    protected void onCreate(Bundle savedInstanceState) {
        super.onCreate(savedInstanceState);
        setContentView(R.layout.activity_main);
        LooperThread thread = new LooperThread(){};
        thread.start();
    }
}
推荐阅读
热点文章

android中Bitmap用法(显示,保存,缩放,旋转)实例分析
12

android 仿微信聊天气泡效果实现思路
1

Android的尺度,drawable-xxxxxxx
2

Codeforces Round #656 (Div. 3) (C、D题)
1

Android之handler异步消息处理机制解析
6

GridView中图片显示出现上下间距过大,左右图片显示类似瀑布流的问题
0

AsyncTask的简单使用
5

两个简单Fragment之间的通信(三种方式)
18

uboot修改设置boot参数命令
41

android中实现从相册中一次性获取多张图片与拍照,并将选中的图片显示出来
2

