canvas实现图片马赛克的示例代码
- 作者: 请叫我李二哈丶
- 来源: 51数据库
- 2021-08-28
1. 原生canvas实现用到的api
1) getcontext(contextid) ---返回一个用于在画布上绘图的环境
canvas.getcontext('2d') // 返回一个 canvasrenderingcontext2d 对象,使用它可以绘制到 canvas 元素中
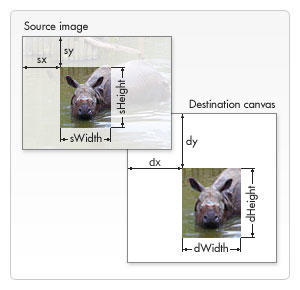
2)drawimage
drawimage(imgobj, x, y)  // 按原图大小绘制, x、y为图片在画布中的位置坐标
drawimage(imgobj, x, y, width, height) // 按指定宽高绘制
drawimage(imgobj, sourcex, sourcey, sourcewidth, sourceheight, destx, desty, destwidth, destheight) // 从原来图片上某一个位置开始(sourcex,sourcey),指定长宽进行剪切(sourcewidth,sourceheight),然后将剪切的内容放到位置为(destx,desty),宽度为(destwidth),高度为(destheight)的位置上
3) getimagedata(x, y, width, height) ---获取矩形区域的图像信息
ctx.getimagedata(0, 0, 10, 10) // 获取左上角坐标为(0, 0),宽高为区域内的图像信息
// 返回imagedata: { width: 10, height: 10, data: uint8clampedarray[400] }
4)beginpath() ---开始一条路径,或重置当前的路径 5)rect(x, y, width, height) ---绘制矩形
6)linewidth ---设置或返回当前线条的宽度
7)fillstyle ---设置或返回用于填充绘画的颜色、渐变或模式
ctx.fillstyle = color|gradient|pattern
8)strokestyle ---设置或返回用于笔触的颜色、渐变或模式
9)globalalpha ---设置或返回绘图的当前透明值
10)fill() ---填充当前的图像(路径)。默认颜色是黑色
【注】如果路径未关闭,那么 fill() 方法会从路径结束点到开始点之间添加一条线,以关闭该路径,然后填充该路径。
11)stroke() ---会实际地绘制出通过 moveto() 和 lineto() 方法定义的路径。默认颜色是黑色
12)todataurl(type, encoderoptions) ---导出图片,type为图片类型, encoderoptions图片质量,[0, 1]
canvas.todataurl("image/png", 1)
2. fabric.js
简化canvas编写的库,为canvas提供所缺少的对象模型
fabric.js能做的事
1)在canvas上创建、填充图形(包括图片、文字、规则图形和复杂路径组成图形)
2)给图形填充渐变颜色
3)组合图形(包括组合图形、图形文字、图片等)
4)设置图形动画集用户交互
5)生成json, svg数据等
3.使用fabric.js实现用到的api
1)声明画布
let canvas =new fabric.canvas('canvas') {
   width: 200,
   height: 200
}
插入图片
let imginstance = new fabric.image(imgelement,{
  left: 0,
  top: 0,
  width: 100,
  height: 100,
  angle: 0
}
3)设置背景图片 setbackgroundimage
canvas.setbackgroundimage(imginstance)
4)renderall() 重新绘制
5)on() 用户交互
canvas.on('mouse:down', function(options) {
   console.log(options.e.clientx, options.e.clienty)
})

// 监听事件
/*
   mouse:down :鼠标按下时
   mouse:move :鼠标移动时
   mouse:up :鼠标抬起时
   after:render :画布重绘后
   object:selected:对象被选中
   object:moving:对象移动
   object:rotating:对象被旋转
   object:added:对象被加入
   object:removed对象被移除
*/
6)getpointer()
7)setwidth()、setheight() 设置canvas的宽高
8)画矩形
let rect = new fabric.rect({
 left: 0,
 top: 0,
 width: 100,
 height: 100
})
add(obj) 添加图形
canvas.add(rect)
10)remove(obj) 移除图形
11)set() 设置对象内容
12)todataurl(obj)
4.原生canvas实现代码
<template>
<div class="container">
<div class="operations">
<ul>
<li @click="mosaic">马赛克</li>
<li @click="addtext">添加文字</li>
<li @click="tailor">裁剪</li>
<li @click="rotate">旋转</li>
<li @click="exportimg">导出图片</li>
</ul>
</div>
<canvas ref="imgcontent" class="img-wrap">
你的浏览器太low🌶
</canvas>
</div>
</template>
<script>
export default {
data () {
return {
context: '',
canvas: '',
ismasic: false,
istext: false,
istailor: false,
istranslate: false,
squareedgelength: 20,
angle: 0,
img: ''
}
},
mounted () {
this.initdata()
},
methods: {
initdata () {
let imgcontent = this.$refs.imgcontent
this.canvas = imgcontent
this.context = imgcontent.getcontext('2d')
let img = new image()
this.image = img
img.crossorigin = "anonymous"
img.src = 'http://oia85104s.bkt.clouddn.com/pictureunlock_193139.pictureunlock.jpg'
this.canvas.setattribute('width', img.width)
this.canvas.setattribute('height', img.height)
let self = this
img.onload = () => {
let beginx, beginy, endx, endy
self.context.drawimage(img, 0, 0)
self.context.save()
self.canvas.addeventlistener('mousedown', e => {
beginx = e.offsetx
beginy = e.offsety
self.canvas.addeventlistener('mouseup', e => {
endx = e.offsetx
endy = e.offsety
if (self.ismasic) {
self.makegrid(beginx, beginy, endx - beginx, endy - beginy)
return
}
if (self.istailor) {
self.context.drawimage(img, beginx, beginy, endx - beginx, endy - beginy, 0, 0, endx - beginx, endy - beginy)
return
}
})
})
}
},
drawrect (x, y, width, height, fillstyle, linewidth, strokestyle, globalalpha) {
this.context.beginpath()
this.context.rect(x, y, width, height)
this.context.linewidth = linewidth
this.context.strokestyle = strokestyle
fillstyle && (this.context.fillstyle = fillstyle)
globalalpha && (this.context.globalalpha = globalalpha)
this.context.fill()
this.context.stroke()
},
// 打马赛克
mosaic () {
let self = this
this.resetclickstatus()
this.ismasic = true
},
makegrid (beginx, beginy, rectwidth, recthight) {
const row = math.round(rectwidth / this.squareedgelength) + 1
const column = math.round(recthight / this.squareedgelength) + 1
for (let i = 0; i < row * column; i++) {
let x = (i % row) * this.squareedgelength + beginx
let y = parseint(i / row) * this.squareedgelength + beginy
this.setcolor(x, y)
}
},
setcolor (x, y) {
const imgdata = this.context.getimagedata(x, y, this.squareedgelength, this.squareedgelength).data
let r = 0, g = 0, b = 0
console.log(this.context.getimagedata(x, y, this.squareedgelength, this.squareedgelength), json.stringify(imgdata))
for (let i = 0; i < imgdata.length; i += 4) {
r += imgdata[i]
g += imgdata[i + 1]
b += imgdata[i + 2]
}
r = math.round(r / (imgdata.length / 4))
g = math.round(g / (imgdata.length / 4))
b = math.round(b / (imgdata.length / 4))
this.drawrect(x, y, this.squareedgelength, this.squareedgelength, `rgb(${r}, ${g}, ${b})`, 2, `rgb(${r}, ${g}, ${b})`)
},
// 添加文字
addtext () {
this.resetclickstatus()
this.istext = true
console.log('添加文字')
},
// 裁剪
tailor () {
this.resetclickstatus()
this.istailor = true
console.log('裁剪')
} ,
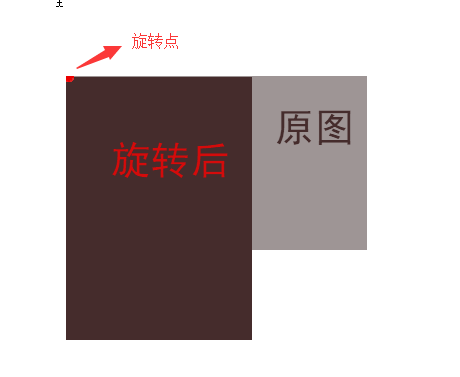
// 旋转
rotate () {
// if (this.angle === 360) {
// this.angle = 90
// } else {
// this.angle += 90
// }
// if ([90, 270].includes(this.angle)) {
// this.canvas.setattribute('width', this.image.height)
// this.canvas.setattribute('height', this.image.width)
// } else {
// this.canvas.setattribute('width', this.image.width)
// this.canvas.setattribute('height', this.image.height)
// }
const x = this.image.width / 2
const y = this.image.height / 2
this.context.clearrect(0,0, this.canvas.width, this.canvas.height) // 清理画布内容
this.context.translate(x, y)
this.context.rotate(90 * math.pi / 180)
this.context.translate(-x, -y)
this.context.drawimage(this.image, 0, 0)
},
resetclickstatus () {
this.ismasic = false
this.istext = false
this.istailor = false
this.istranslate = false
},
exportimg () {
this.resetclickstatus()
const exporturl = this.canvas.todataurl("image/jpeg")
let a = document.createelement('a')
a.setattribute('download', '')
a.
document.body.appendchild(a)
a.click()
}
}
}
</script>
<style scoped lang="less">
.operations {
width: 1200px;
margin: 0 auto;
ul {
display: flex;
align-items: center;
margin-bottom: 30px;
li {
list-style: none;
margin-right: 20px;
cursor: pointer;
}
}
}
.img-wrap {
display: block;
margin: 0 auto;
}
</style>
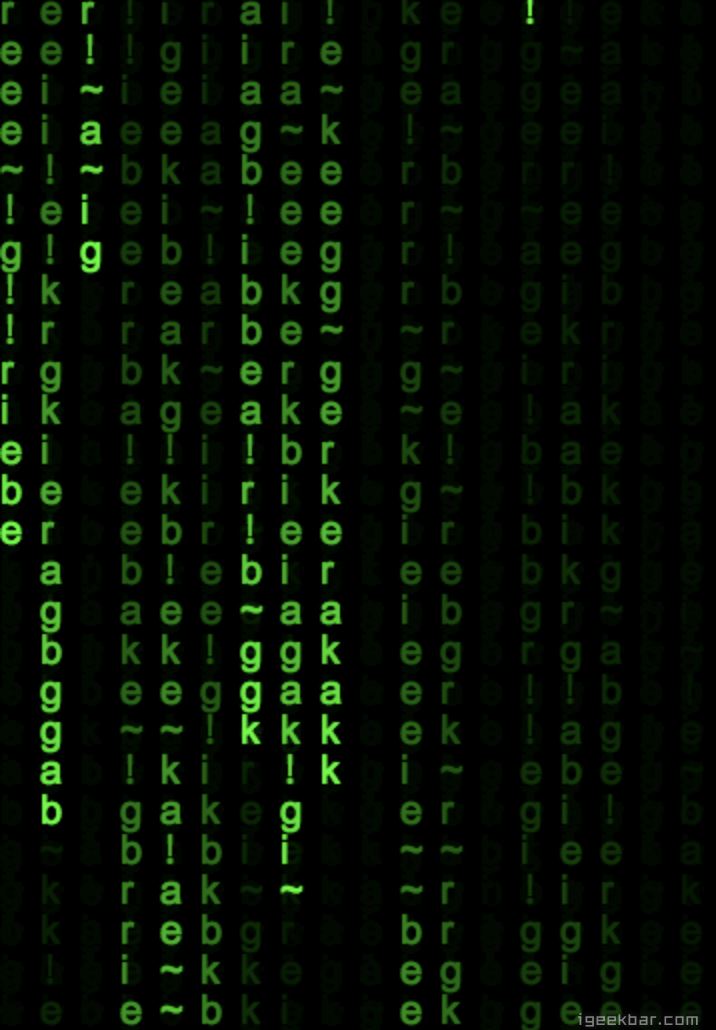
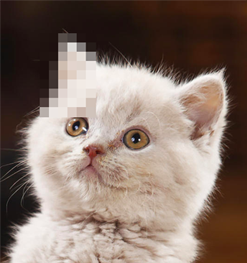
效果图如下:
以上就是本文的全部内容,希望对大家的学习有所帮助,也希望大家多多支持。