WordPress 插件定制
在本章中,我们将学习如何在WordPress中自定义插件,而无需编写任何HTML或CSS。 它通常是多用户网站的一个大额外添加。 这种新方法可让您使用WordPress主题自订工具(无需编码技巧)自订您的登入网页。
以下是在WordPress中自定义插件的简单步骤。
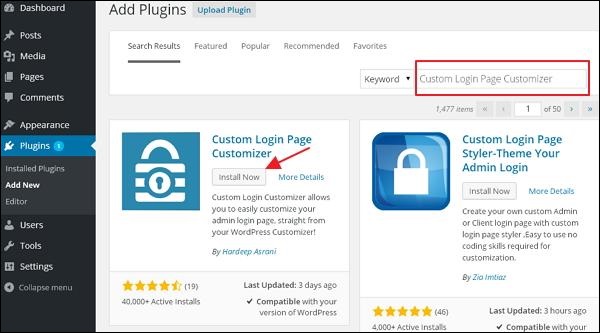
步骤(1) - 点击Plugins → Add New。

步骤(2) - 安装并激活自定义登录页面自定义程序插件。

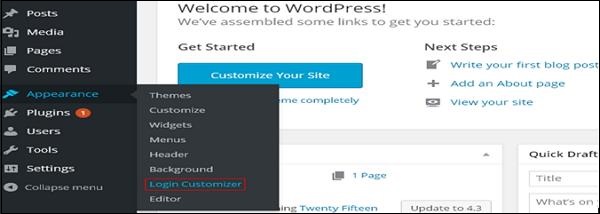
步骤(3) - 点击Appearance → Login Customize部分。

步骤(4) - 点击Start Customizing按钮继续操作。

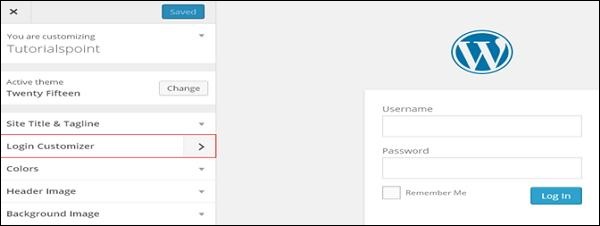
步骤(5) - 它将启动内置的WordPress主题customizer。 您可以自定义主题,并使它看起来你想要的方式。

点击侧面板中的新登录定制工具标签。 将显示登录定制程序页面。 在登录定制程序页面上,您可以按照自定义WordPress主题的方式自定义登录页面。
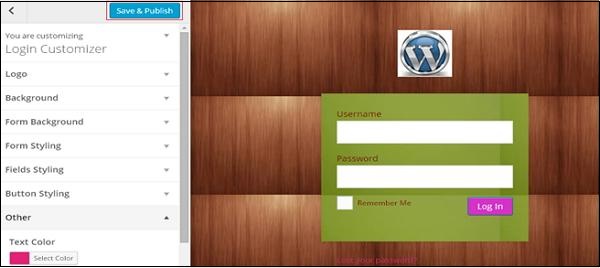
步骤(6) - 自定义登录页面将如下所示显示。

Logo- 上传您选择的徽标,以替换默认的WordPress徽标。
Background- 添加背景图片,或者您可以选择所选的背景颜色。
Form Background- 为您选择的登录表单容器选择表单背景图片或颜色。
自定义程序面板中的大多数选择都是透明的。 您可以检查自定义程序中的所有选择,以根据登录页面的要求调整设置。 点击Save and Publish按钮。
